Got the rogue ground wire soldered onto the tone pots, but that wasn’t the problem. It was when I desoldered the jack because I forgot the nut and then resoldered that I think I made a mess of the ground at the jack.
First Pics…No, Not Quite
Was almost about to be able to post photos of the newly completed Ke Kai….until the audio test failed. Could barely hear faint notes, but they were so faint that my tuner couldn’t pick up the signal. I propped up the bass near the rest of the arsenal, started cleaning up my tools….and noticed a wire sitting on the desk that I’d set aside.
Yup, forgot a connection. Hoping that’s it, because I really don’t want to try to de-solder and reconnect everything again.
Tomorrow.
First Test-Fit
First test-fit of pieces for Cabernet.
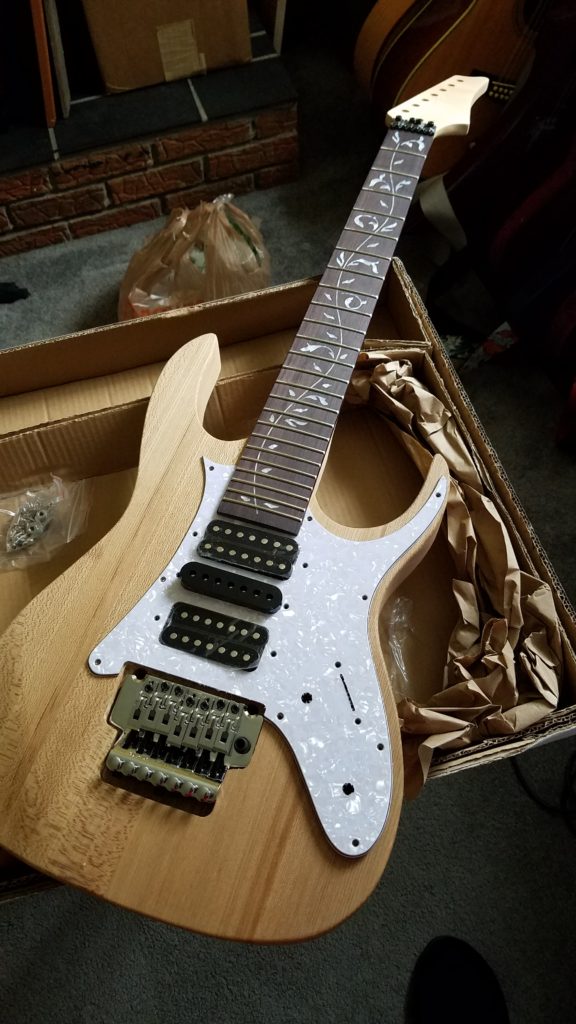
The pickguard is going to be painted red. That white pearloid just isn’t my style! 🙂
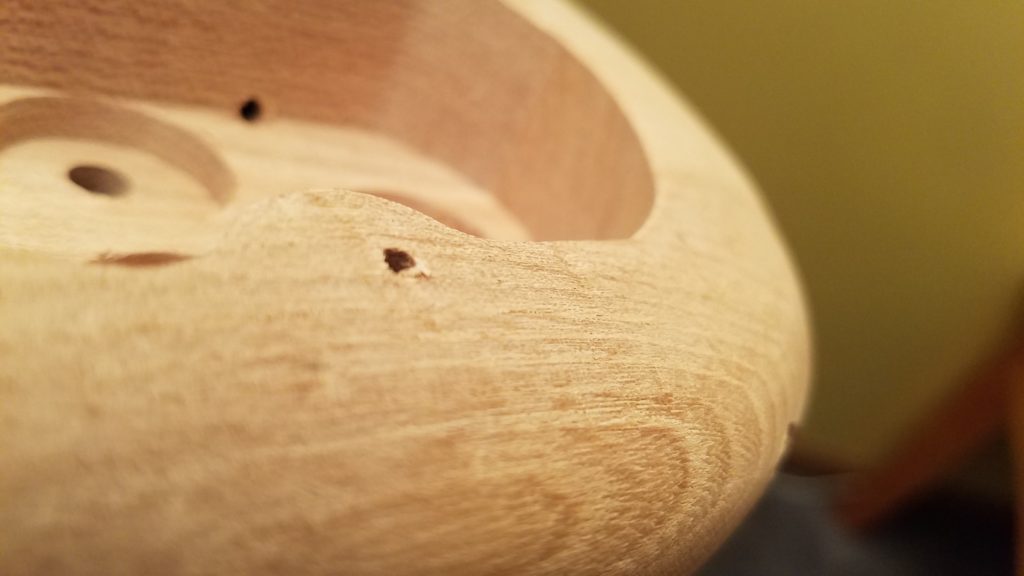
But this little crack was why it $50 was knocked off:
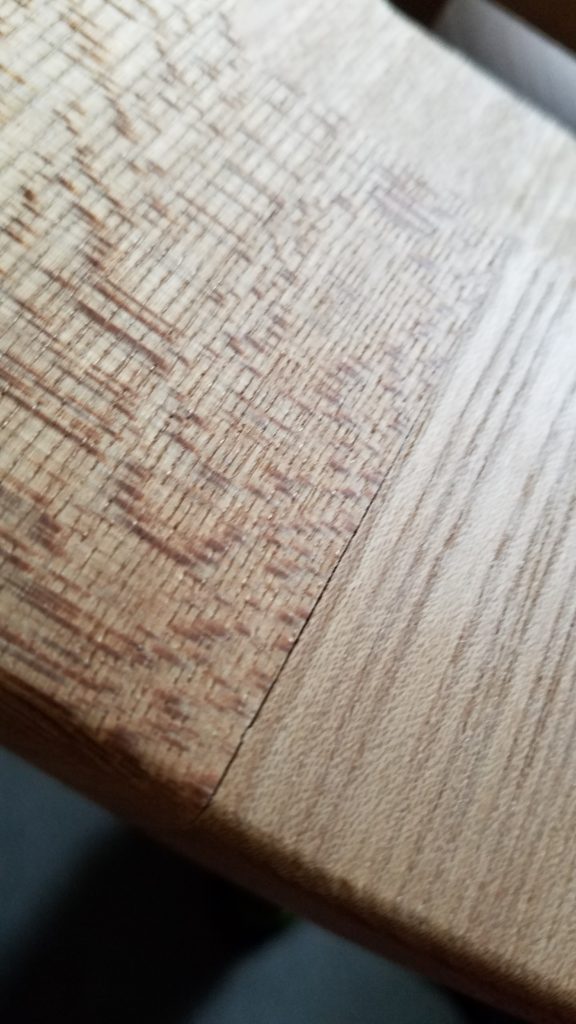
A $5 tube of wood filler will take care of it.
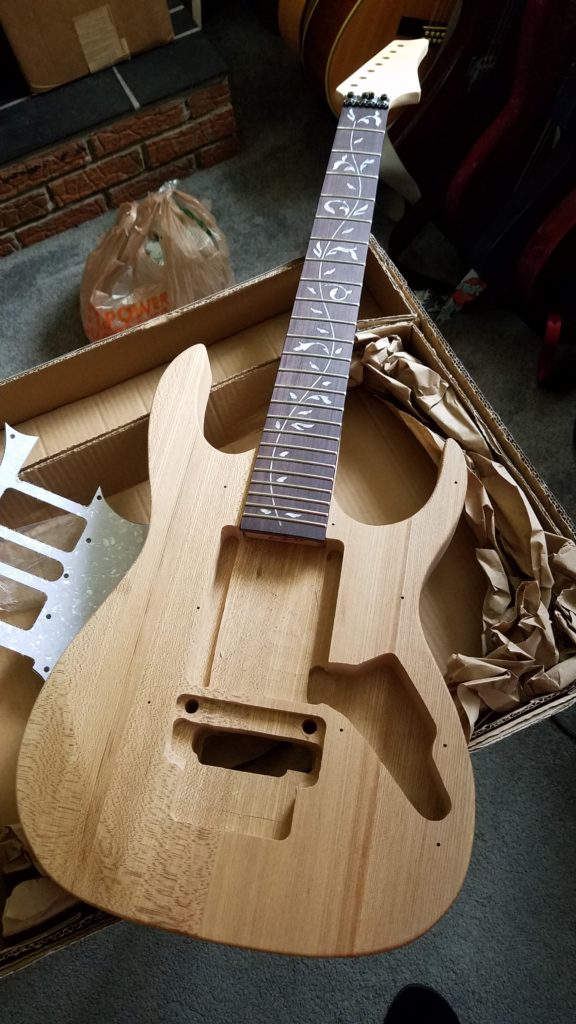
Arrival and Name
The new guitar kit has arrived, and after a test-fitting/inspection, it’s interesting to note that the crack in the body that led to this being considered a B-stock is hardly noticeable. I’ve ordered a tube of wood filler anyway from Home Depot, which I’ll go pick up tomorrow.
Name-wise, I’m going with “Cabernet.” It’ll be red, to fit with the guitars I have at the permanent home and also to take advantage of the vine themed inlays on the fretboard.
The mental picture for the theme:
- Body & headstock dyed red to highlight the natural wood look
- Red on neck (heh…)
- Black grain filler on body
- Pickguard sprayed to a deep red
- Black faded burst style with dye, like what I did for Ke Kai
The trem is actually a Floyd-Rose-licensed piece, just like on Madeleine, my Jackson Kelly.
I’d considered a set of Dimarzio pickups in red, but that would’ve cost me almost $300, so I’ll have to save that for another time.
New Project
Solo Guitars had a B-stock item available, one of two models that I’d been looking at. Since it was $50 off and requiring what appears to be a $5 repair, I went for it. An Ibanez JEM-inspired 7-string. No name as of yet, will need to wait until it’s in my hands and I have an idea of how to finish it.
The inspiration here came from wanting a lower-tuned guitar. Either a 7-string or a baritone, neither of which I’ve had in my collection ever. I was considering a Rhoads-style V, then either setting it up and tuning it to B-to-B as a fake baritone on a traditional 6-string scale, or in the wildest of fantasies, installing a custom baritone-scale neck from Warmoth.
Only problem with that plan was that the neck I designed at Warmoth ended up at $365 for the neck alone. So that’s not happening! But an ebony fretboard, with black perloid starburst inlays for fret markers?
Maybe some day…. Anyway….

The rated build challenge is higher than that of Blue-J or Ke Kai, probably because of the Floyd-Rose-inspired tremolo bridge. But lucky for me, Madeleine, my Jackson KE-3, has a FR trem that I’ve learned to adjust.
I’m not sure yet if I’ll go with the red theme to match my other instruments down at the permanent home or a blue/green to fit with the gear up north. I was leaning toward just pure green because of the vine inlay on the fretboard, and calling it Poison Ivy, but that’s kind of cliché already.
I don’t know, maybe something red and calling it Chateau Picard? 🙂
Not quite brutal enough for a 7-string, though.
Excel & Hockey – A Tale of a Nerd
I love watching hockey. I’m a little sad that I’ve never actually played, but not by much. And being a self-professed nerd and geek, I’m naturally attracted to the statistics of hockey.
An aside: I am not to the point of being a statistician and analytics expert; I read the analytics articles on various hockey sites and I get lost.
For 20 years, I’ve been tracking various bits and pieces of hockey data in Excel. For the majority of the time, it was all manual entry with the performance line (W, L, OTL, etc.). Naturally, I could calculate points, max points possible, goals per game, points per game and so on.
But I needed more automation because manual entry is a thing of the past. After falling into Excel’s Get & Transform (twin to Power BI’s Power Query), automation began to take hold.
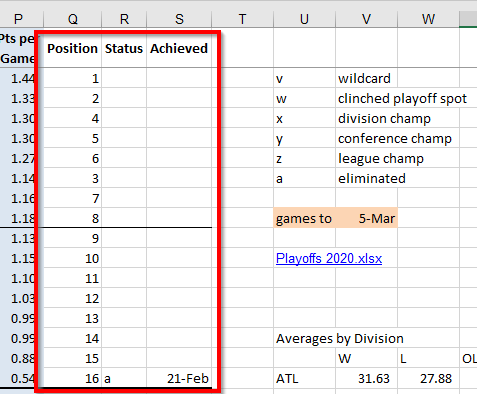
This is the base worksheet of my Excel workbook. Looks familiar to anyone who’s looked at league standings, regardless of sport.
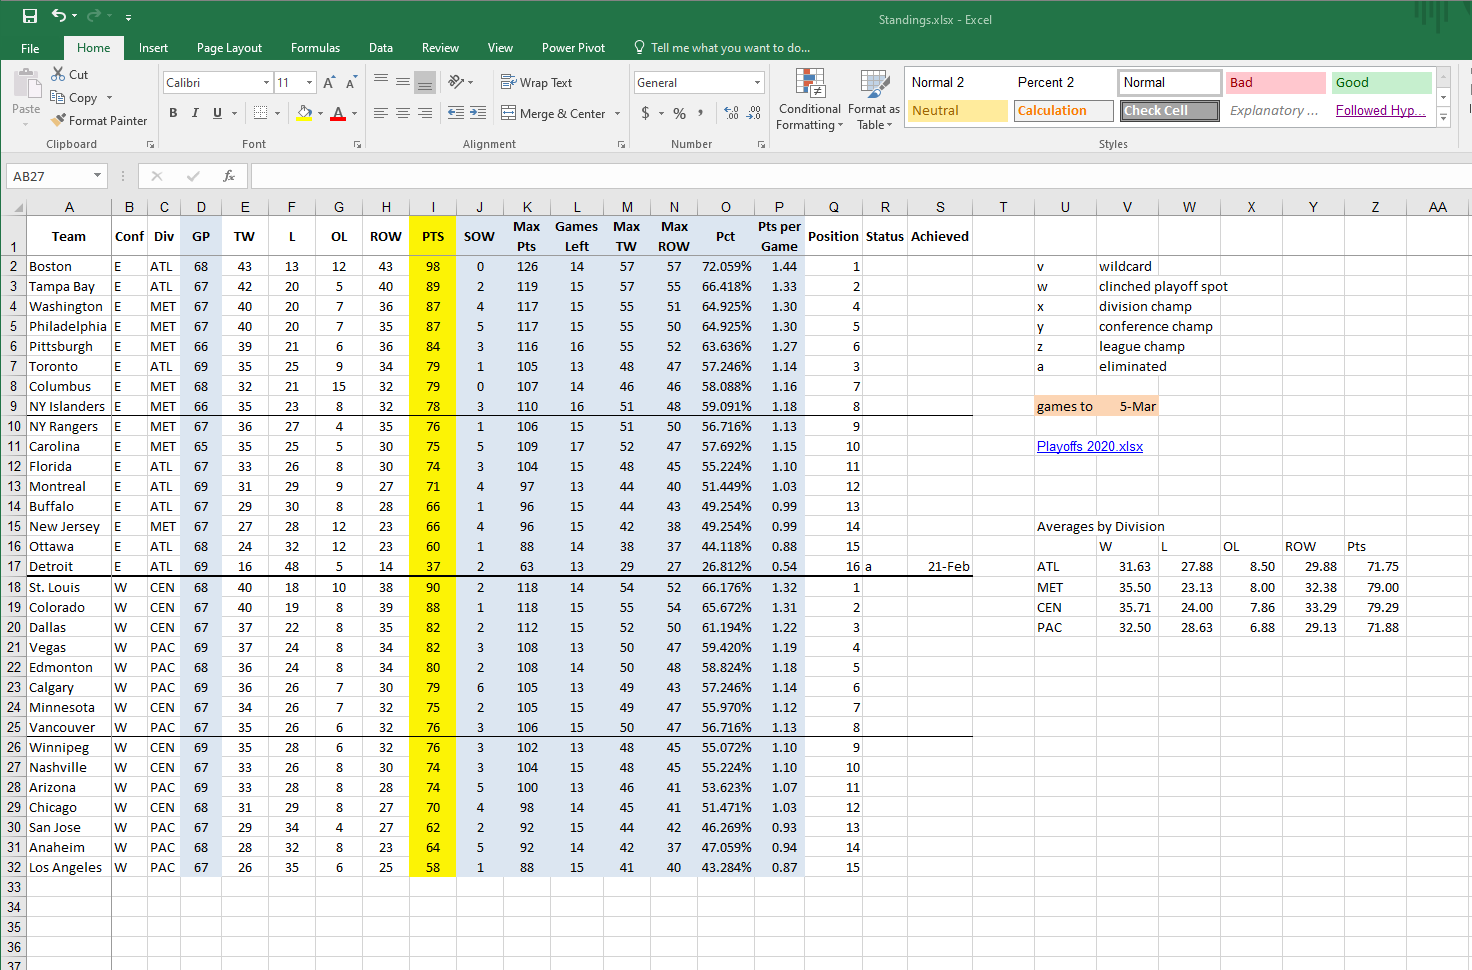
Most of the cells are formulas. The highlighted columns would be the obvious choices for calculations, and those were ones I had for a long time already. Teams rarely change, and when they do, it’s monumental enough to where manual updates are going to be necessary.
Atlanta folding and moving to Winnipeg, changing names, conference, and division. The birth of Vegas. The division realignments of 2014.
So columns A, B, and C are okay being manual (though I automated that as well; more below). But I was sick of manually updating the wins, losses, and OTLs. There HAD to be a better way. And yes, there is.
Enter Get & Transform. Details are in this link, so I won’t waste space explaining it here.
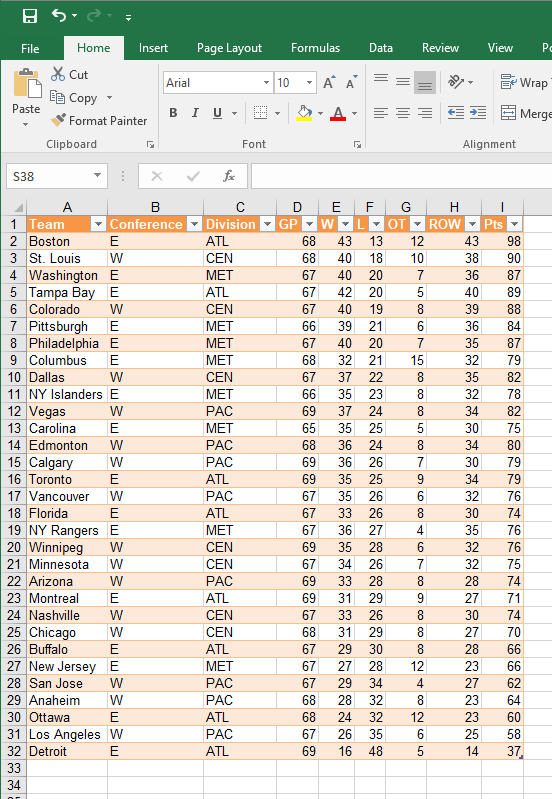
I created a reference worksheet to house the link to an online source that updates current year standings. Then, using G&T, I manipulated the source to output what I wanted.
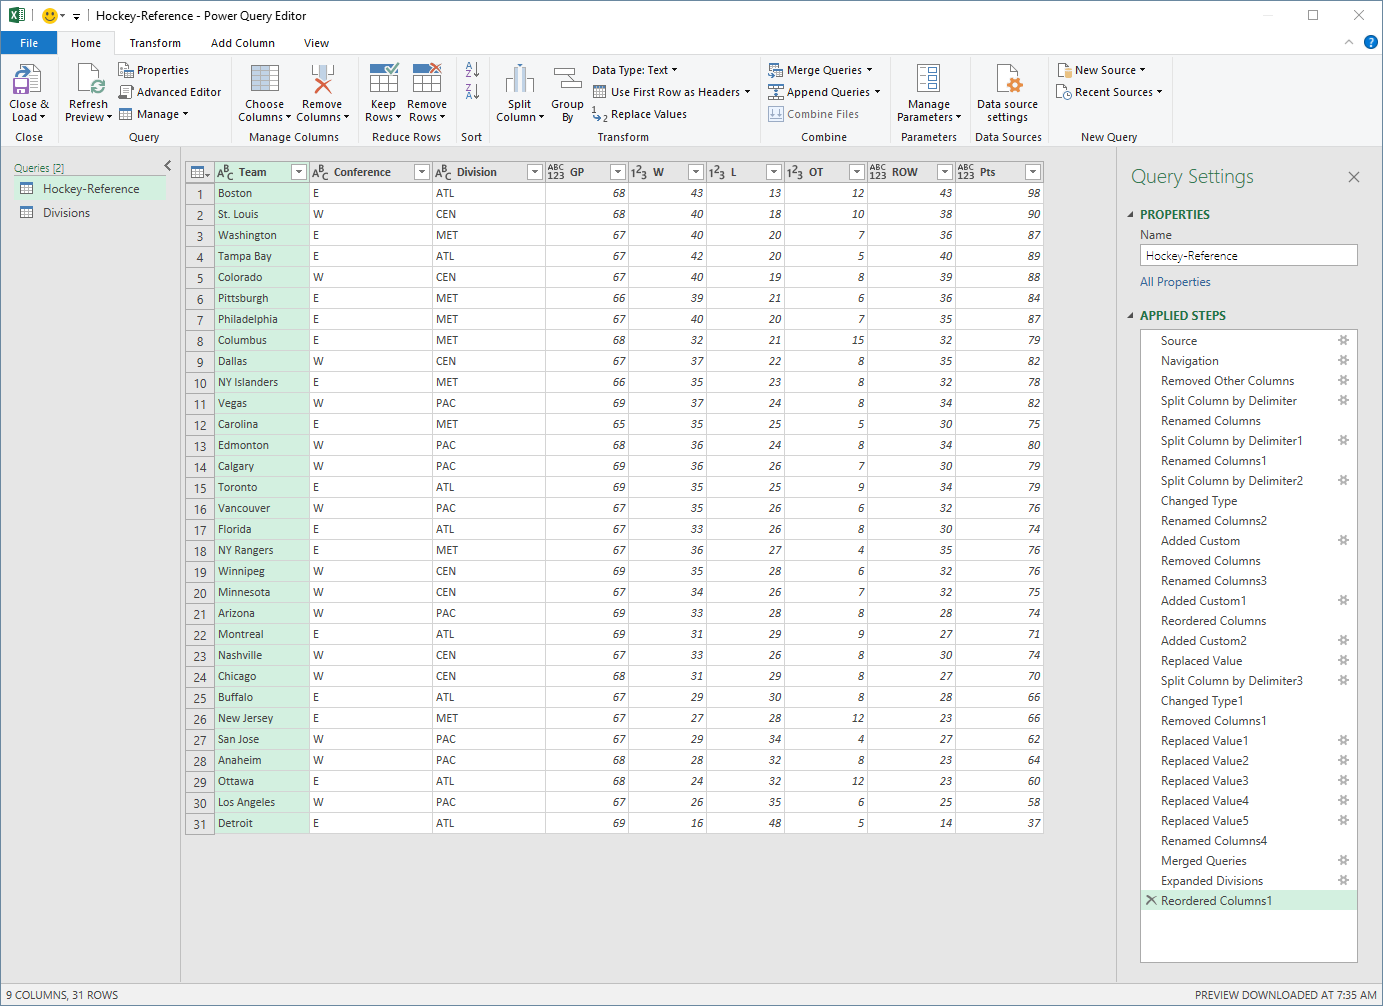
The “Divisions” query in the left column is what I was mentioning. At the end of the workbook list, I have the teams, conference, and divisions laid out because the source I was using had those listed in a way that I couldn’t use. Using a merge, I pulled together the team names, conference, and division.
All the steps on the right are how I manipulated the original Web source to look how I wanted it. This resulted in the “live feed” worksheet.
Now that we’re out of Narnia (what I call the Get & Transform environment; if you’re curious why Narnia, come to a session I’m teaching on this topic), I can use it on the detailed worksheet.
In each of the result columns, I’m using a VLOOKUP:
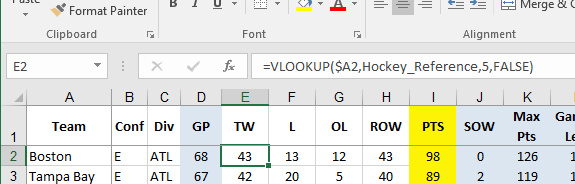
I should be using an INDEX/MATCH to get away from so much dependence on VLOOKUP. I’ll probably get there next season.
What I haven’t figured out yet, though, is how to label playoff position. Since the NHL rules are a little more complex than just “top 8 teams in each conference get in,” I haven’t figured out how to capture those sorting rules in a formulaic manner. Maybe next season for that, too!
I was reading the recap of the Red Wings – Blackhawks game of last night (3/6/20). Wings won 2-1, and this line in the article struck me as notable.
Chicago is last in the Central Division despite having a winning record and its point total doubled Detroit’s entering the game.
That piqued my curiosity. I looked in my standings sheet, and sure enough, the Blackhawks are 31-29-8 but rank last in the division and out of the playoff picture.
That indicates that the Central is the strongest division in the league. Visually, I’m guessing that Atlantic is the weakest division, then (based on the performance of Detroit and Ottawa). But how do I verify that?
Let’s look at averages for the divisions.
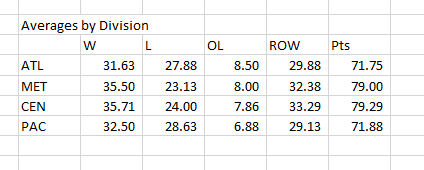
The formula here uses AVERAGEIF. AVERAGEIF will grab the cells that you need based on certain criteria. In this case, I wanted to calculate the average of all cells in the source if the reference matched. The reference I’m using is the division abbreviation in the first column, which matches the division values in Column C of my standings table.
For each of the W-L-OL-ROW cells, if the division matches, average those values. For the wins cell, the formula is =AVERAGEIF($C$2:$H$32,$U17,$E$2:$E$32)
$C$2:$H$32 is the absolute reference covering the columns from division through ROW, and of course, 2 through 32 refer to the individual team rows.
$U17 is the absolute column within this averages table that contains the reference division. 17 is a relative notation because when I copy/paste this formula to the other cells, I want the rows to change accordingly but not the column so I can continue to reference the division.
E$2:E$32 is the range of the values I want averaged, based on the reference division. The column is relative while the rows are absolute. Since the W-L-OL-ROW is in the same order in the standings as well as in my averages table, I can accept Excel adjusting the columns in the formula automatically.
Now I can confirm that, based on average points earned by teams per division, Central is the strongest division with 79.29 points and Atlantic is weakest with 71.75 points.
There are some cube functions also in Excel where I could probably pull the teams by division, combine the new table with the average then plot them visually, but I’ll probably do that next season as well.
Why Does Any of This Matter?
Seems like a total waste of time since I’m not up to the caliber of hockey analytics people like TSN’s Travis Yost or the analysts being hired by NHL teams directly now. But it does feed my curiosity by putting the data that I want to see in one spot without having to click everywhere on the Internet.
It also serves as practice, learning new functions and how they behave. Then I can put that to better use on the job. So what starts as hockey stats can become analytical methods for student data.
Almost Done
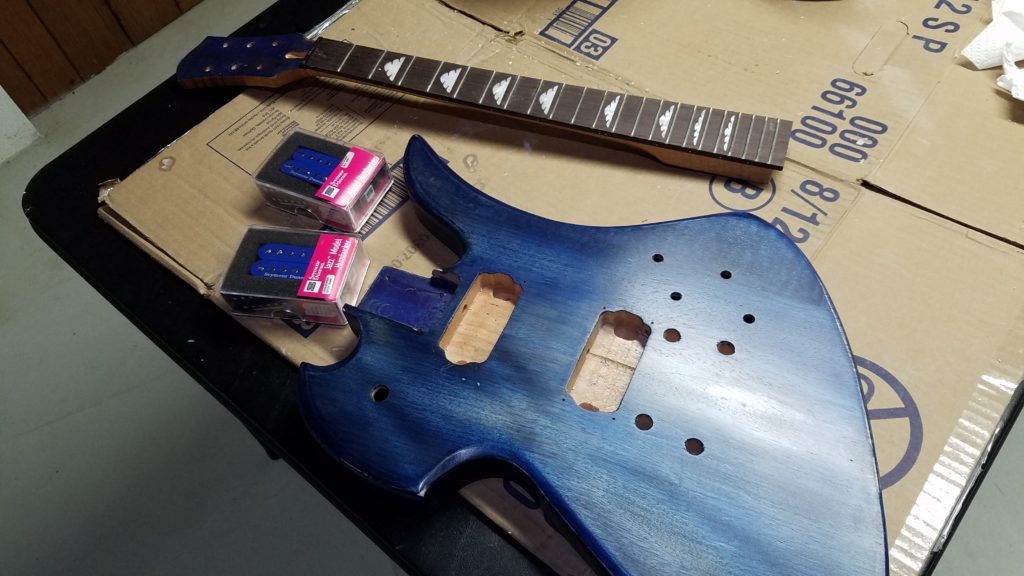
Last week, we went up north. I took up Ke Kai in kit form to start work on her, and also some finishing pieces and tools for Blue-J.
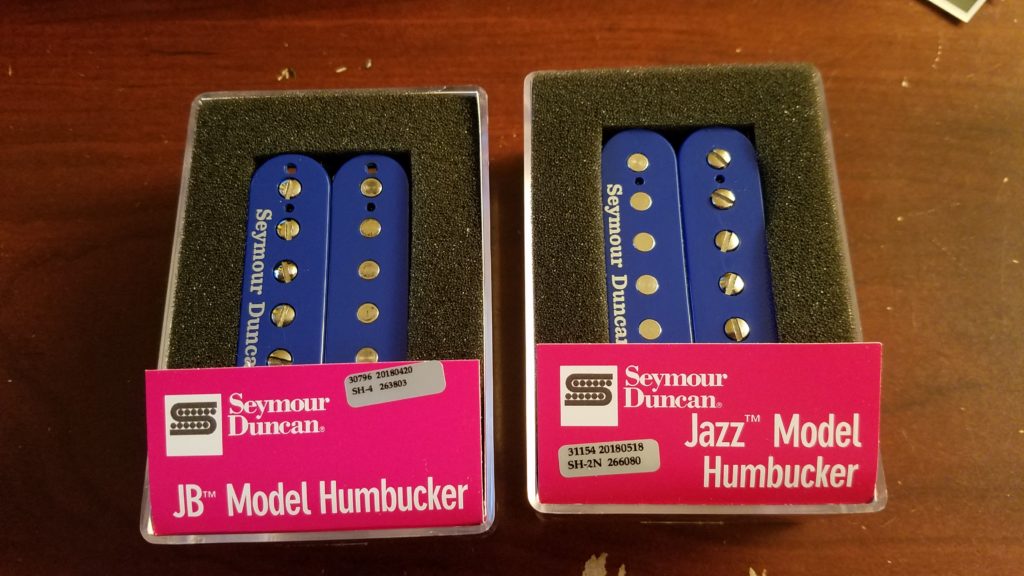
The finishing pieces included a set of Seymour-Duncan humbuckers in blue that I found on eBay.
After careful review of the wiring instructions, I was still a bit shaky in confidence, so I grabbed a notebook and diagrammed the existing wiring to corroborate the published instructions. The issue was that the published instructions and diagrams just had lines connecting the components but in completely different colors. The pots and wires were already partially assembled so I had trouble tracing where each one went.
But after I rewrote everything, I gain enough confidence to begin soldering.
And I realized that I need that Doc Ock soldering “third hand” thing. But somehow, I managed to get everything soldered in place.
Before tightening everything down, like the pickups, selector switch, and pots, I had to plug it in to test sound. I’d read a passing post from another guitar builder forum that while tape can’t be effectively used to test out solder points, I can check the integrity of my solder job by touching the poles of the pickups with a metal screwdriver.
I plugged into my little 2-watt Marshall portable amp, and with each volume & tone knob set, I cycled through the pickup selector switch to test the pickups. Everything seemed good.
OK, time to tighten down everything, finish final assembly, and string it up!
Then came another problem, due to not inspecting all the parts more closely.
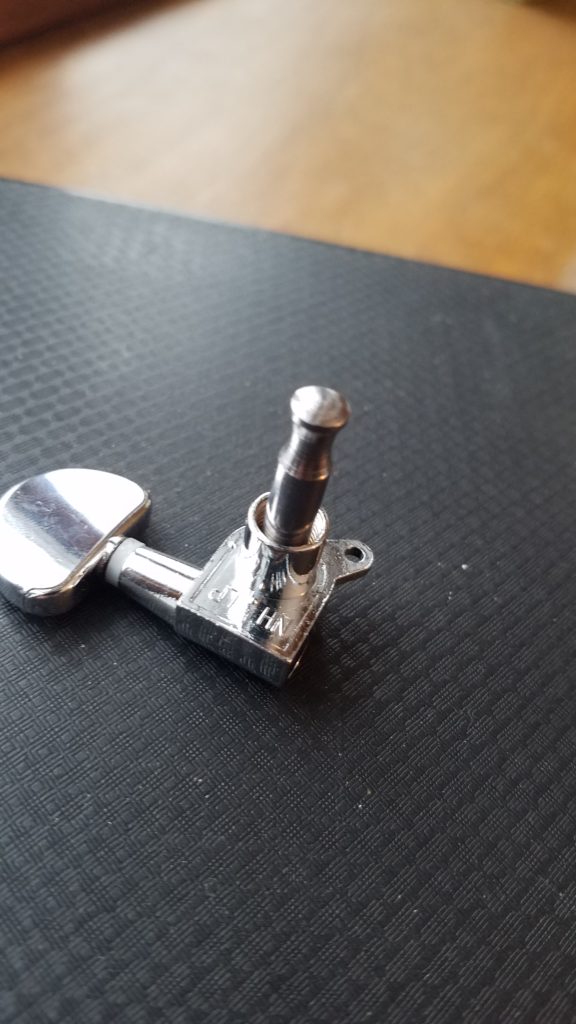
I had one tuning machine completely missing the string hole in the shaft. There’s no way to feed a string! I’ve since been in contact with Solo, and they’re sending me a replacement. In the meantime, Blue-J is a 5-string guitar.
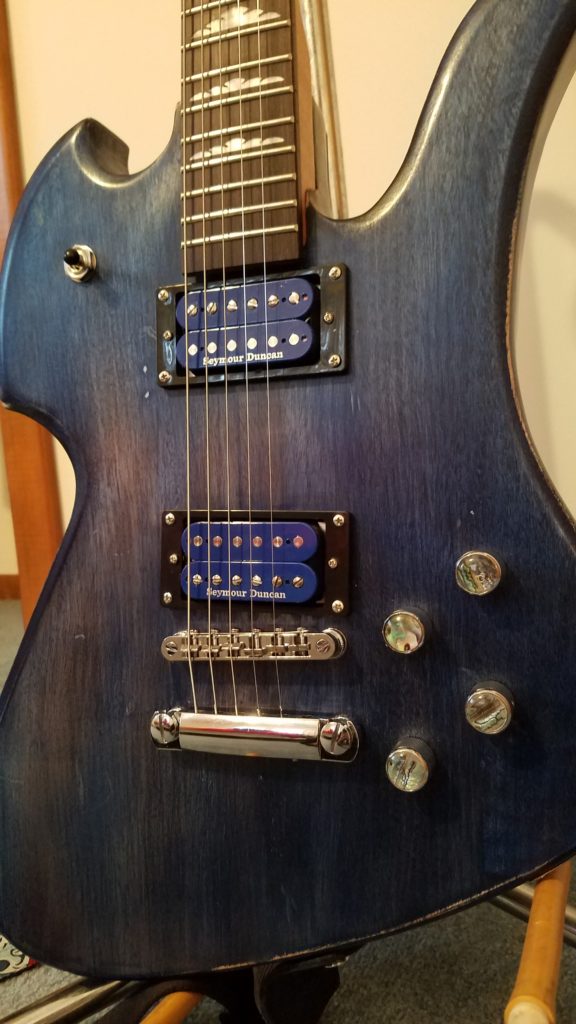
I replaced the stock knobs with abalone-topped dome knobs. I have a set of black ones so I might swap out two of the chrome for the black ones to give it a bit of visual indicator which is tone/vol or which is bridge/neck. Not sure yet, will have to try it out to see how it looks.
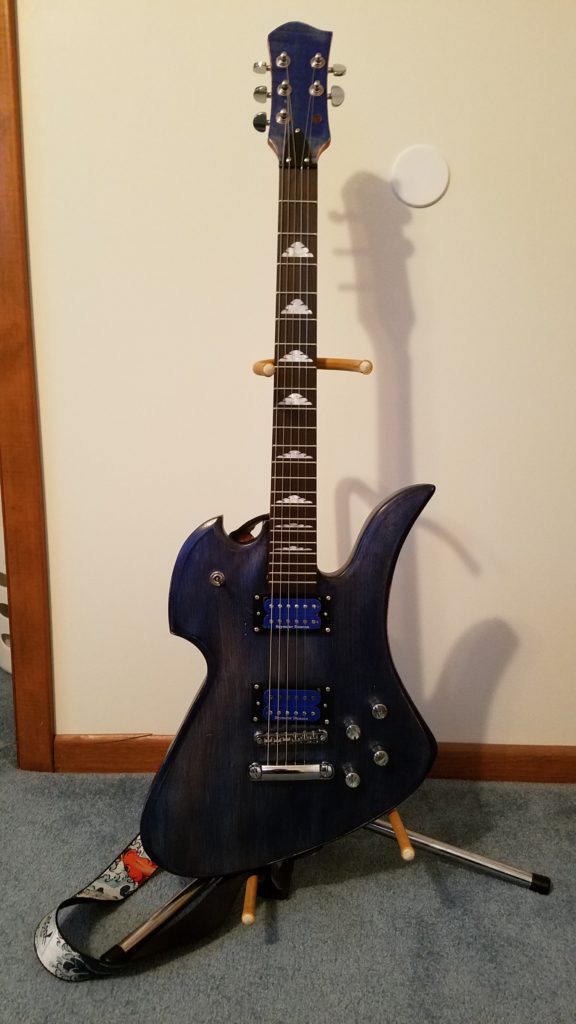
Hopefully, when I get back up there in April, I’ll have the last tuning machine in hand to complete Blue-J.
But even with just the five strings, I plugged her in through my distortion and delay pedals. Running through Danzig’s “Twist of Cain,” I was able to make that E squeal with the appropriate harmonic. I’m not able to play my latest song snippet idea as that requires all 6 strings, but that’ll come.
Overall, I’m very happy with how this kit turned out. I learned a lot about coloring and wood finishing that I’ve begun applying to Ke Kai. Now I have to manage my growing addiction to building guitar kits!
Like collecting hockey jerseys, this could get overly expensive if I’m not careful. And guitars take up more room than jerseys.
Prep, Coloring, and Coating
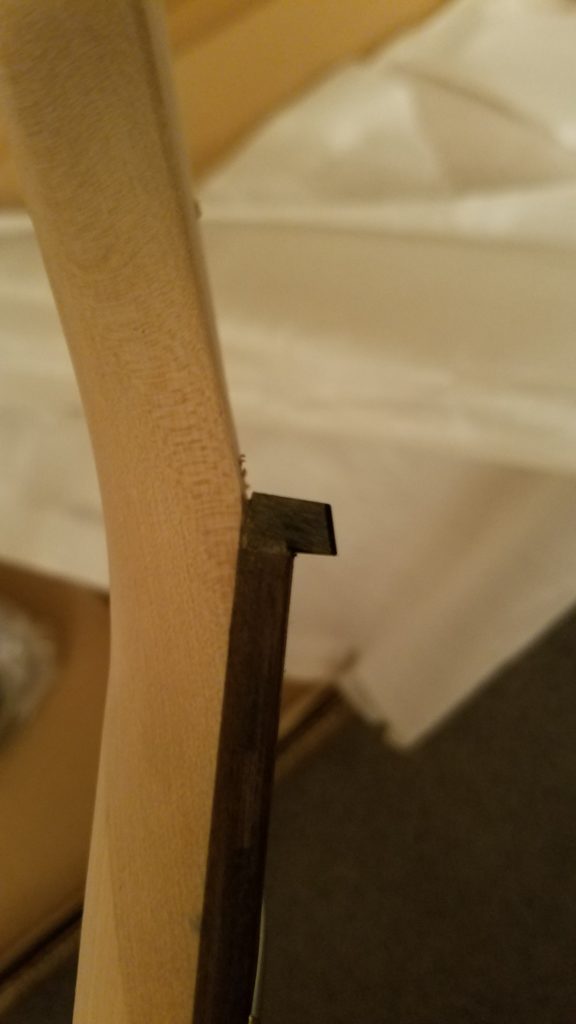
The first thing I noticed was that the nut was awful. Too high, and slots too narrow for the strings. The action was so high that playing the first fret was nearly impossible.
There were also a number of dings and scratches in the body.
To take care of the nut, I had to buy a set of nut files. I was too aggressive on the slot for the low-B, because it ended up too low in the nut and buzzed on the first fret. I found out that a drop of superglue allowed to dry and cure would act as “padding” to raise it up.
So I did that…and inadvertently glued my finger and thumb together with just a single drop. That ended up being several minutes in the bathroom with nail polish remover.
Another problem was the roughness of the frets’ ends. Running my hands up and down the edges of the fretboard, I was catching all the points and ragged ends of the frets. In 30-some-odd years of playing guitars and basses, I’ve never experienced this. I used an old jeweler’s file I had lying around to smooth out the ends of all the frets.
After the test assembly, I found that I need to level the frets, because after adjusting action and relief, I still had buzz on about the 13th or 14th fret on the D string. I was really irritated at the low quality of this kit by this point.
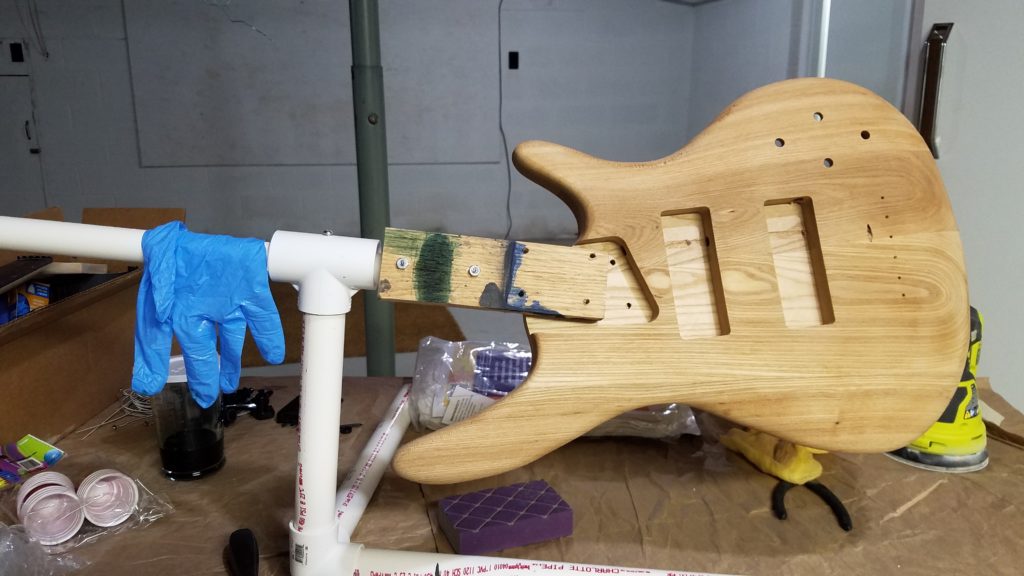
The Journey to the Workshop
Last week, we were up north so I could start working on Ke Kai as well as finishing Blue-J. I sanded down the body of the bass to smooth out the dings and such, and also ran some major sanding on the neck. I attached the body to the rig and began prep and color.
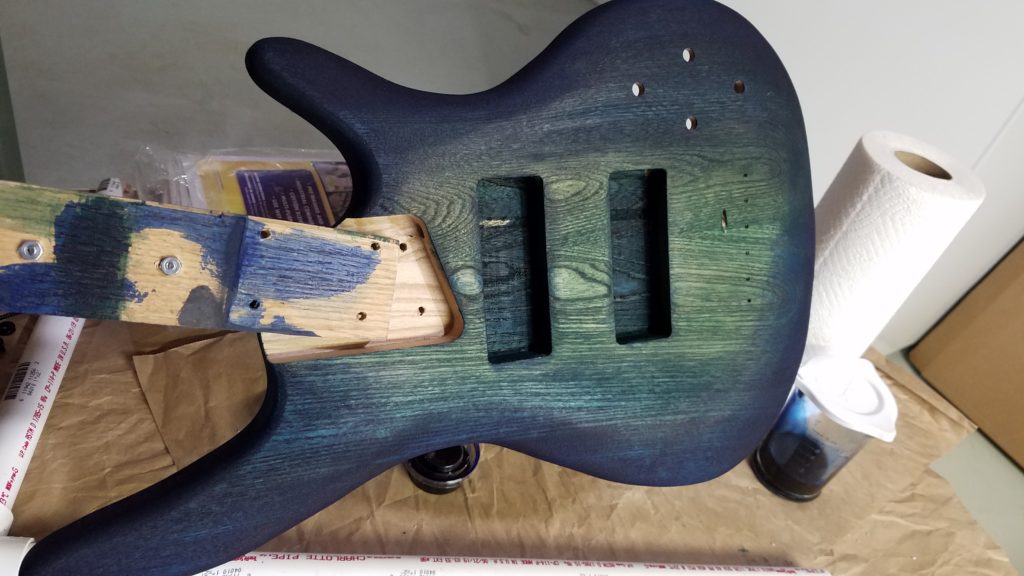
Ke Kai – Intro
Hawaiian for “To the Sea.”
After going back and forth with indecision over whether I want a 4-string or 5-string bass, I decided on another 5-string. I also had new ideas for color and finish, so the Ke Kai project will be a bit more advanced practice for this absolute beginner in guitar finishing.
Before I ordered the kit, I ordered a plank of ash and staining supplies to practice the ideas in my head. A friend suggested using prestain conditioner to more evenly distribute the color.
Throughout the practice phase, I had to work through a lot of impatience as well as my current skill level not quite up to the task of what’s in my head, so I’ve compromised and in that effort, I think I’ve come upon a design idea that could be both achievable and unique.
The kit is a 5-string ash-body bass from TheFretwire. After receiving the kit and examining the parts, I’ve determined that it’s of lower quality than the kit I received from Solo. But part of DIY kit building is to make-do with the included hardware until/unless one saves up the money to upgrade over time.
Work will begin later in February when we’re back at the house up north.
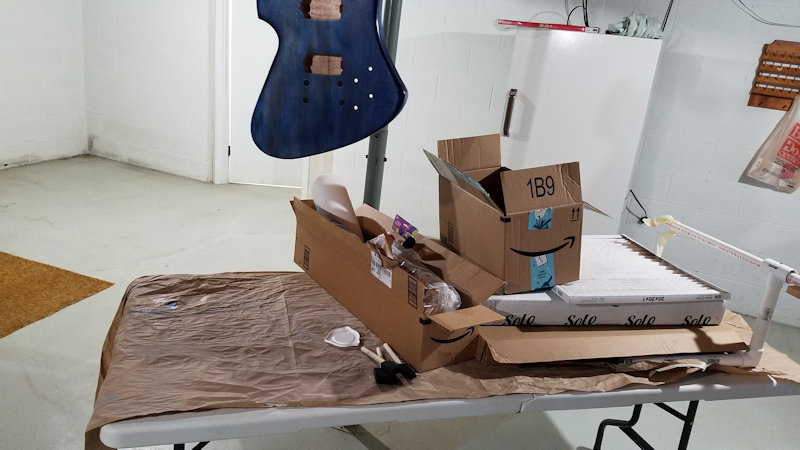
Final Coats and Departure
Today is the day of departure. We’re heading back home after over a week up north. I’ve decided to leave Blue-J up here to fully cure, since we’re not likely to be back until February. I decided to take advantage of the extra time by spraying more coats onto the body, and also stain the headstock after all.
I was nearly out of the Watco lacquer. The Duplicolor shipment had arrived on Friday, so I decided to give that a try on top of the Watco. After all, I had 4 coats of the Watco on already.
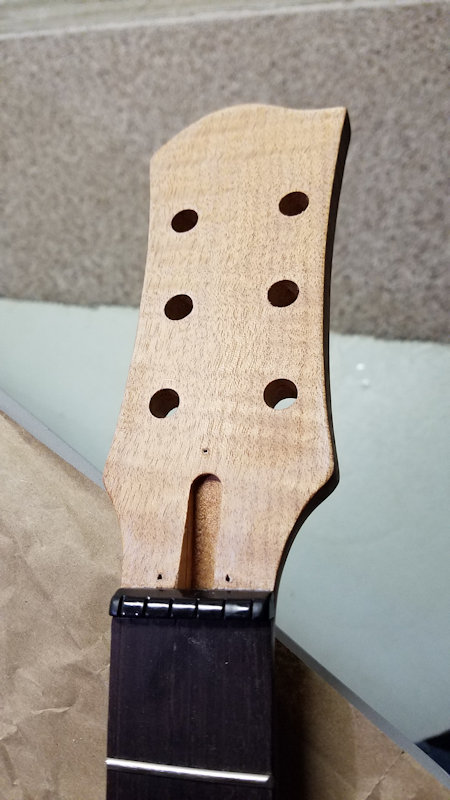
I removed the hardware and sanded down the face. I masked off the sides, nut, and most of the fretboard, and shoved paper towel into the truss rod cavity. I also backed the tuning peg holes with masking tape.
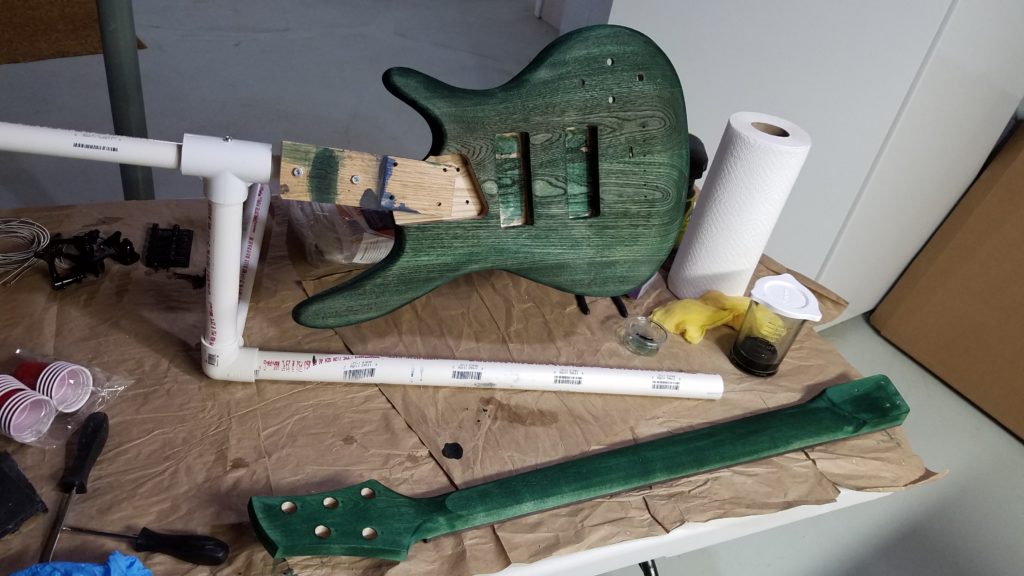
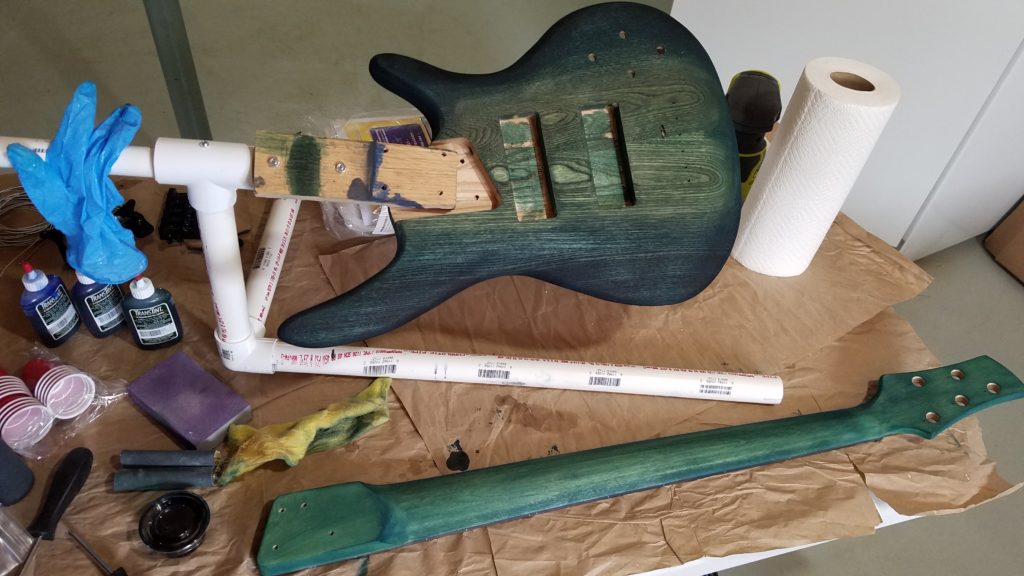
Stained with a higher concentration of the diluted blue tint, and sprayed clear in multiple coats along with the body and got this.
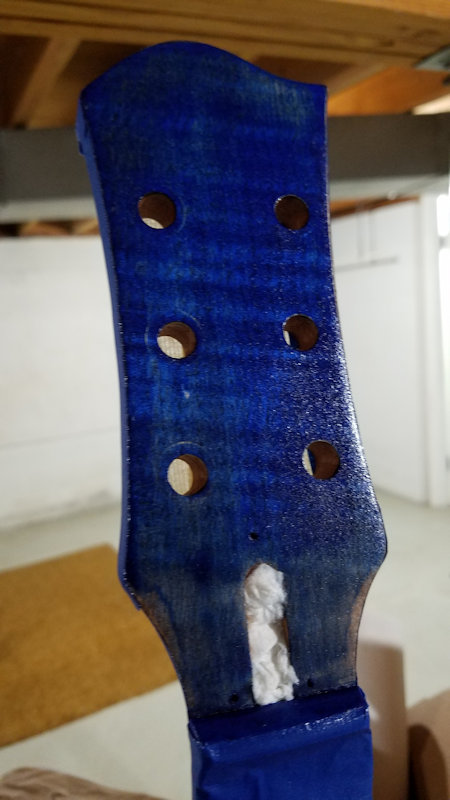
I can see where it was more difficult to sand down by the nut and at the top of the headstock because I didn’t get all of the shipping sealer off. But, another lesson learned.
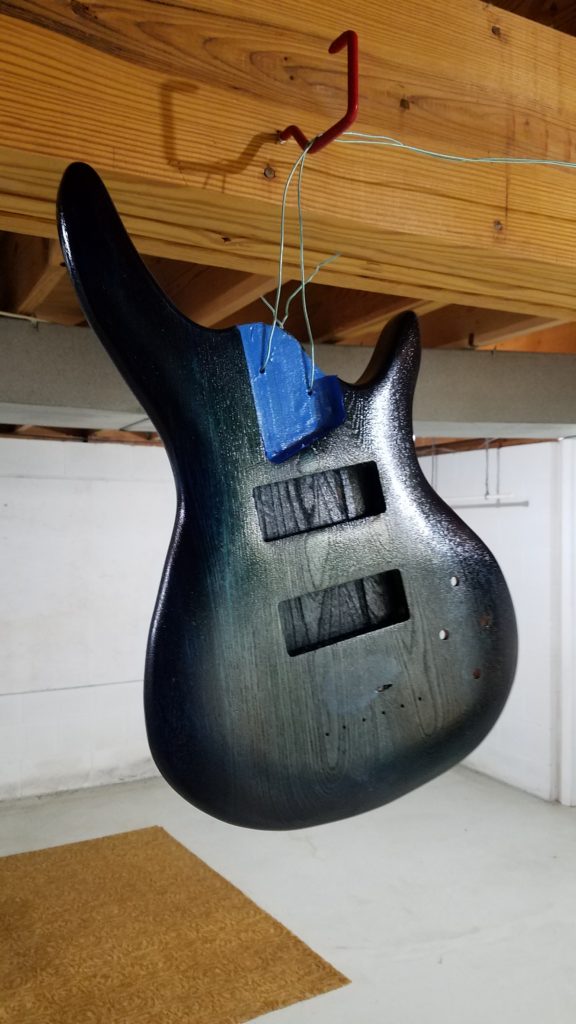
I reassembled the basement, putting the window panes back into place and cleaned up my work area. I moved the guitar more toward the center of the basement and moved the table underneath it; I had this sudden fear of the suspension wire giving out and the body crashing to the floor, splitting in half.
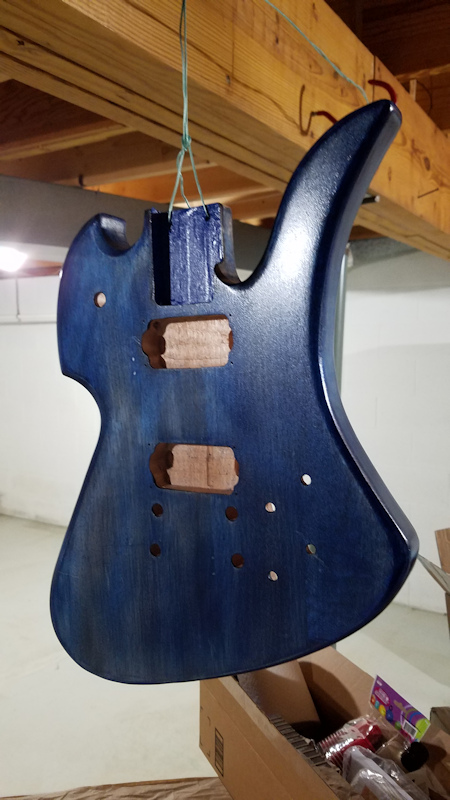
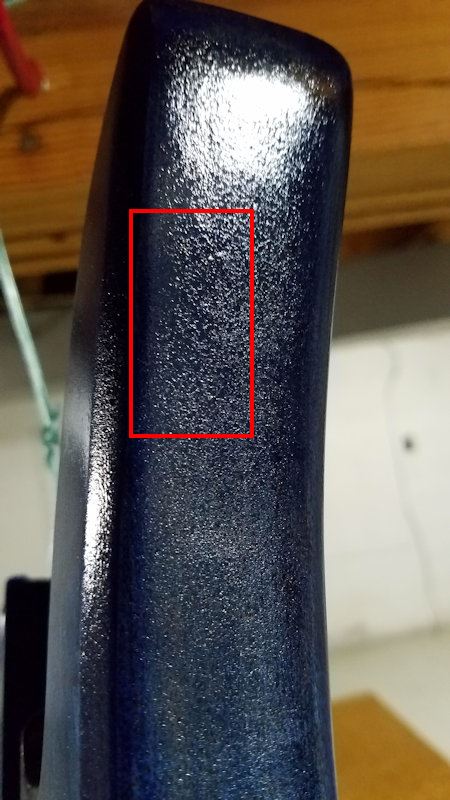
The Duplicolor sprayed a lot more finely so there’s more pebbling/orange-peel than the Watco. Duplicolor also smells a hell of a lot worse (not to say that the Watco was like smelling a pot of pasta sauce on the stove or that breathing the fumes is a good idea, but still…).
On the first coat, I was too heavy handed because I wasn’t expecting the velocity of spray compared to the volume. I ended up with two drip spots on the body that I didn’t notice until the first coat had dried for almost 2 hours. I gently sanded down with 400-grit, cleaned the areas, and sprayed the 2nd coat (again, 3 passes per coat, with intervening dry time).
I let the work dry overnight and inspected during workstation clean-up. The spot under the horn is barely noticeable, but the one on the back is still there though not nearly as bad as when I first noticed it.
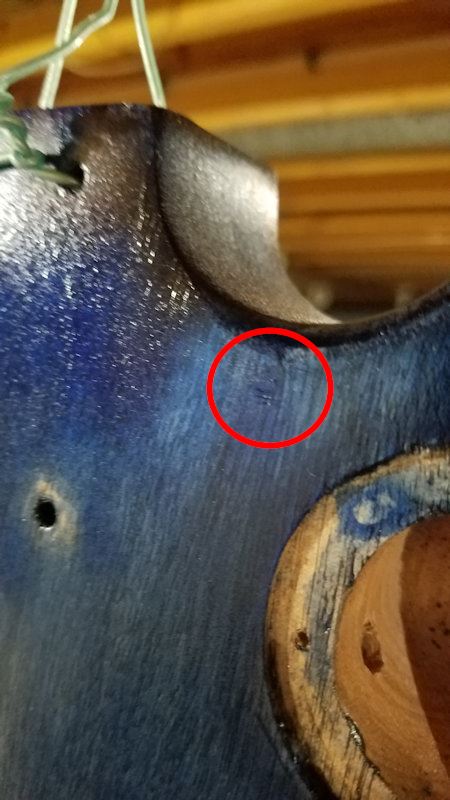
I hope to get a better idea of repairing this in February.